Building a Simple User Interface Programmatically
In the next two lessons we'll learn how to build a simple user interface the Android way. That means we'll not be using any of the great convenience methods that Ruboto provides. I'm teaching it this way because Ruboto doesn't have a large support community right now, but Android does. That means as a Ruboto developer, you'll need to understand Ruboto as a means to writing android apps. You'll need to be able to translate from the Android way to the Ruboto way!
One of the first things that can be a little confusing in Android programming is that there are two ways to create / manipulate elements of your app: programmatically and via XML.
The XML way is more Android-like but the programmatic way is more Ruby-like. So I'll start off by showing you how to build this interface programmatically. Then we'll build it with XML.
The Programmatic Android Way
To start, let's create a new project like so:
- Go back to that nice directory that you are planning on sticking your apps in. And then
- Type
ruboto gen app --package com.tutorials.first_app.
ruboto gen app creates your whole project. There are A LOT of files here, we'll wade into them slowly. The most important one right now is first_app/src/first_app_activity.rb.
(For more details on the files created, and other options (besides --package) that you can pass to ruboto gen app you should definitely read How Ruboto Works.)
Activities
Open the first_app_activity.rb file from the src/ directory. The template
that Ruboto beautifully generates for you is neat, but we're going to throw it
all away and start from scratch. So go ahead and replace the contents of this file
with the following:
class FirstAppActivity
  def onCreate(savedInstanceState)
    super
  end
end
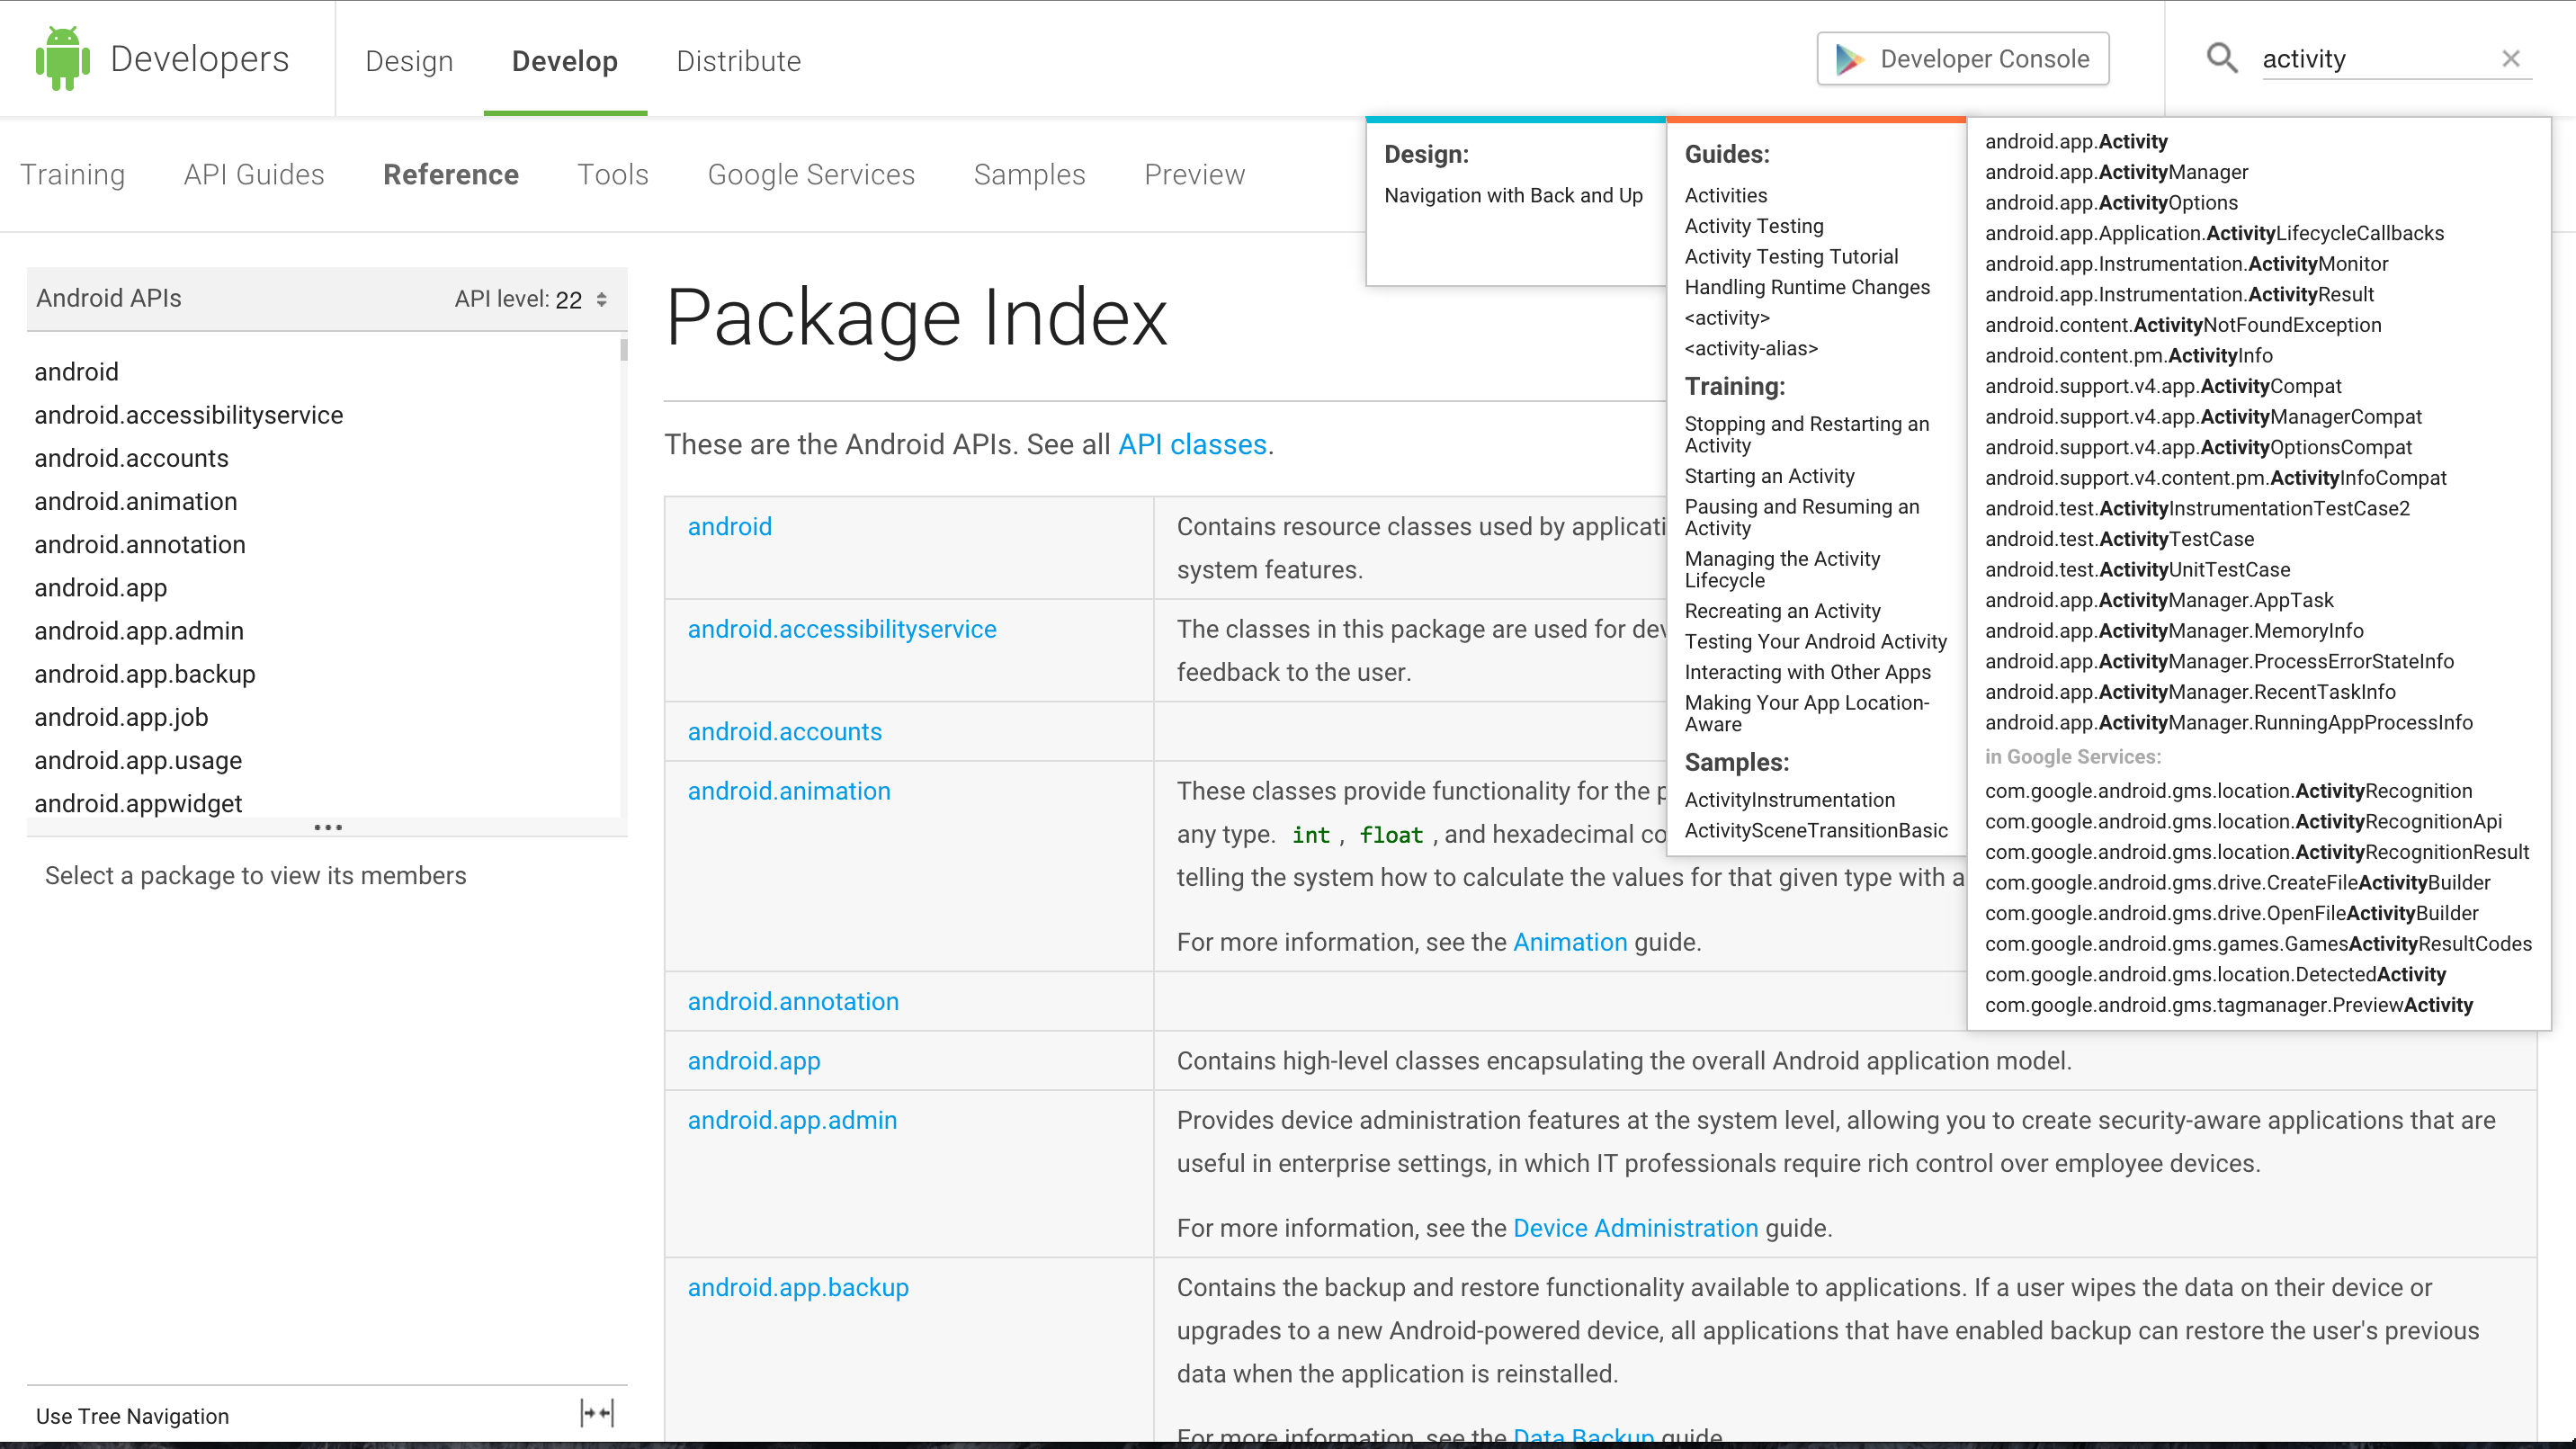
This bit of code creates an Activity. Before going on, please check out the guide on activities and peruse the reference on them. You can quickly access either by going to the developer website, and searching for activity in the top-right corner:
From these guides, you will have learned that an activity is the basic unit of display in Android OS architecture. If you want to show the user something, then you had better put that something into an activity.
From the reference you'll also see a nice diagram about the lifecycle of an app. The piece of that
lifecycle that we'll work with in this app is onCreate, and it takes an argument of type Bundle called savedInstanceState.

Views
As explained in the Activity reference:
Almost all activities interact with the user, so the Activity class takes care of creating a window for you in which you can place your UI with
setContentView(View)
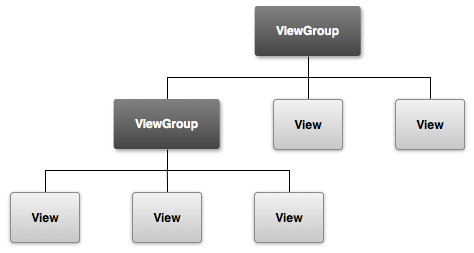
So we've got to build a view and attach it to the window.
The view that we'll be using today is the LinearLayout. Reading through the guide a bit you'll learn that a LinearLayout is a view group that we can use to combine several UI elements together:
We'll create the LinearLayout like so:
class FirstAppActivity
  def on_create(bundle)
    super
    Java::android.widget.LinearLayout.new(self)
  end
end
With this line of code, we are calling the Java class android.widget.LinearLayout and using
its public constructor new to create an instance of it. (Search for that in the docs if you're new to Java's concept of constructors, and if you don't see why it's android.widget.LinearLayout go click on that link to the LinearLayout docs above.) The syntax blends Java and Ruby in a way that you'll get more familiar with as we go. This sort of blending comes a la JRuby not Ruboto.
Now let's attach the view to our activity with the setContentView method. This is setting the root view of the activity.
class FirstAppActivity
  def onCreate(savedInstanceState)
    super
    layout = Java::android.widget.LinearLayout.new(self)
    setContentView(layout)
  end
end
Add a Text Field
So for our first widget, let's just add a simple happy little text field (the thing that you type text into). The class we're looking for is EditText:
class FirstAppActivity
  def onCreate(savedInstanceState)
    super
    layout = Java::android.widget.LinearLayout.new(self)
    edit_text = Java::android.widget.EditText.new(self)
    layout.addView(edit_text)
    setContentView(layout)
  end
end
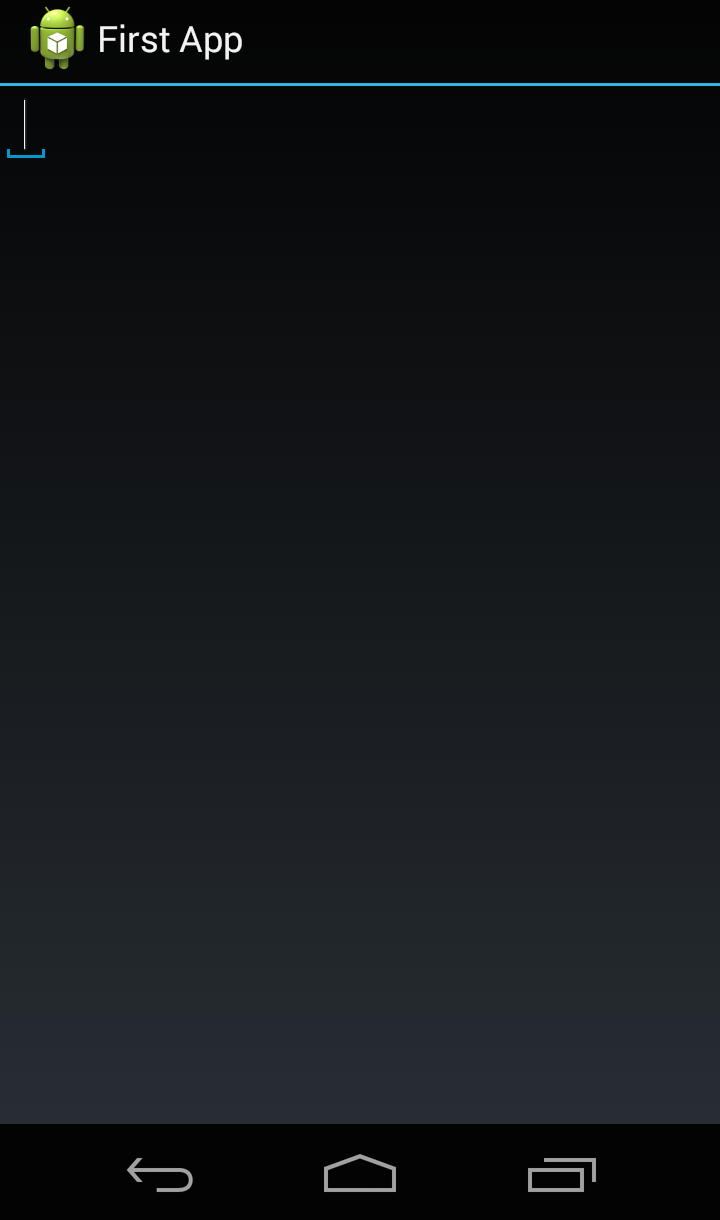
Ta da. You did it! Now you have a working app. Go ahead and try it out by running rake install start.
Or if you already did this and just want to update your app to reflect the new changes run rake update_scripts and restart your app.
As long as your changes are in your ruby files, then rake update_scripts will update your app.
Add a Button
Lastly we'll add a button:
class FirstAppActivity
  def onCreate(savedInstanceState)
    super
    layout = Java::android.widget.LinearLayout.new(self)
    edit_text = Java::android.widget.EditText.new(self)
    button = Java::android.widget.Button.new(self)
    layout.addView(edit_text)
    layout.addView(button)
    setContentView(layout)
  end
end
A Little Styling
In the programmatic approach, some things can be styled very easily. For example, you can
add a "hint" to the EditText and some text to the button like so:
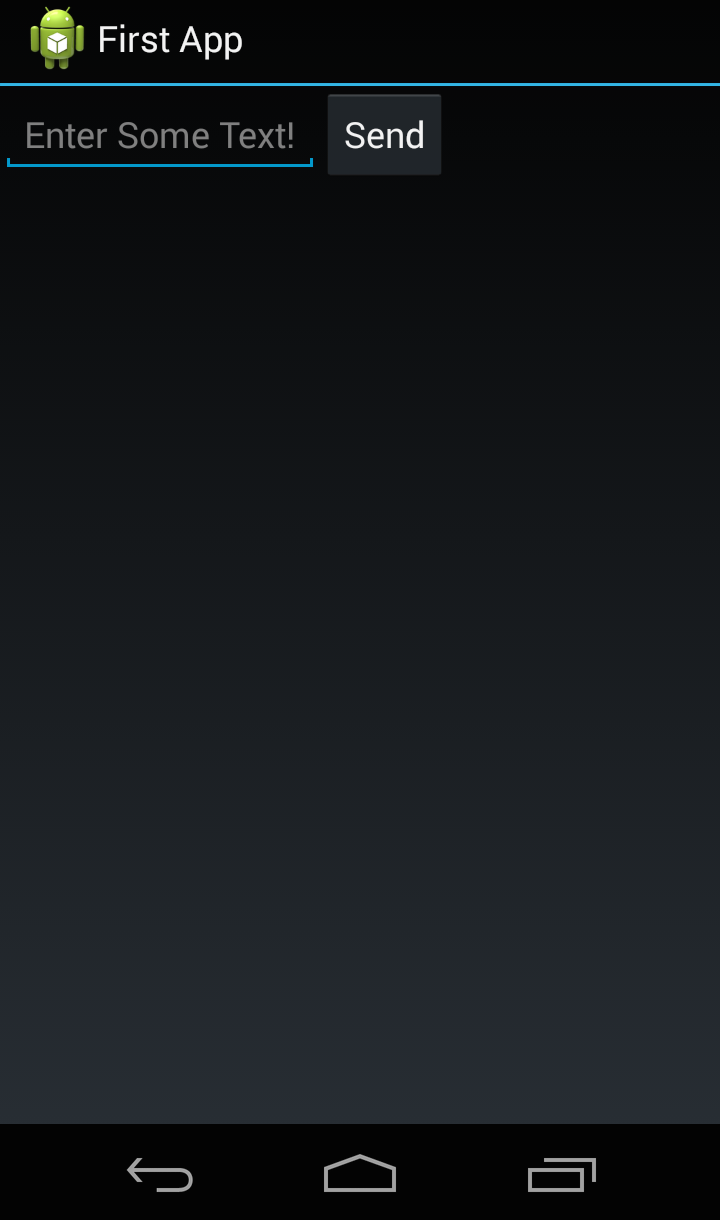
Ok, the other thing making the text field look weird is that usually those things don't start out blank. They usually have some kind of faint gray text that disappears when you click on them. That text is called the "hint":
class FirstAppActivity
  def onCreate(savedInstanceState)
    super
    layout = Java::android.widget.LinearLayout.new(self)

    edit_text = Java::android.widget.EditText.new(self)
    edit_text.setHint("Enter Some Text!")
    layout.addView(edit_text)

    button = Java::android.widget.Button.new(self)
    button.setText("Send")
    layout.addView(button)

    setContentView(layout)
  end
end
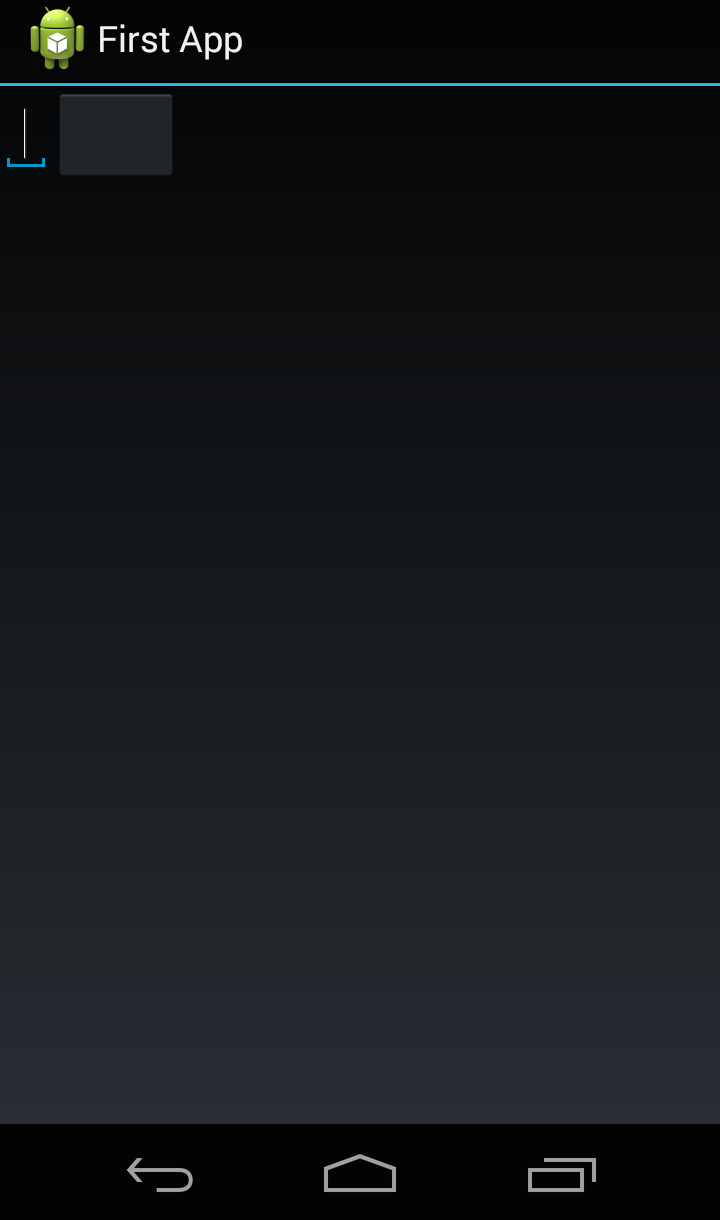
Once again, we'll run the program to see what it looks like.
Programmatic Size Control
So far, the programmatic approach seems fine. So let me give an example of where things can get a little hard: size control.
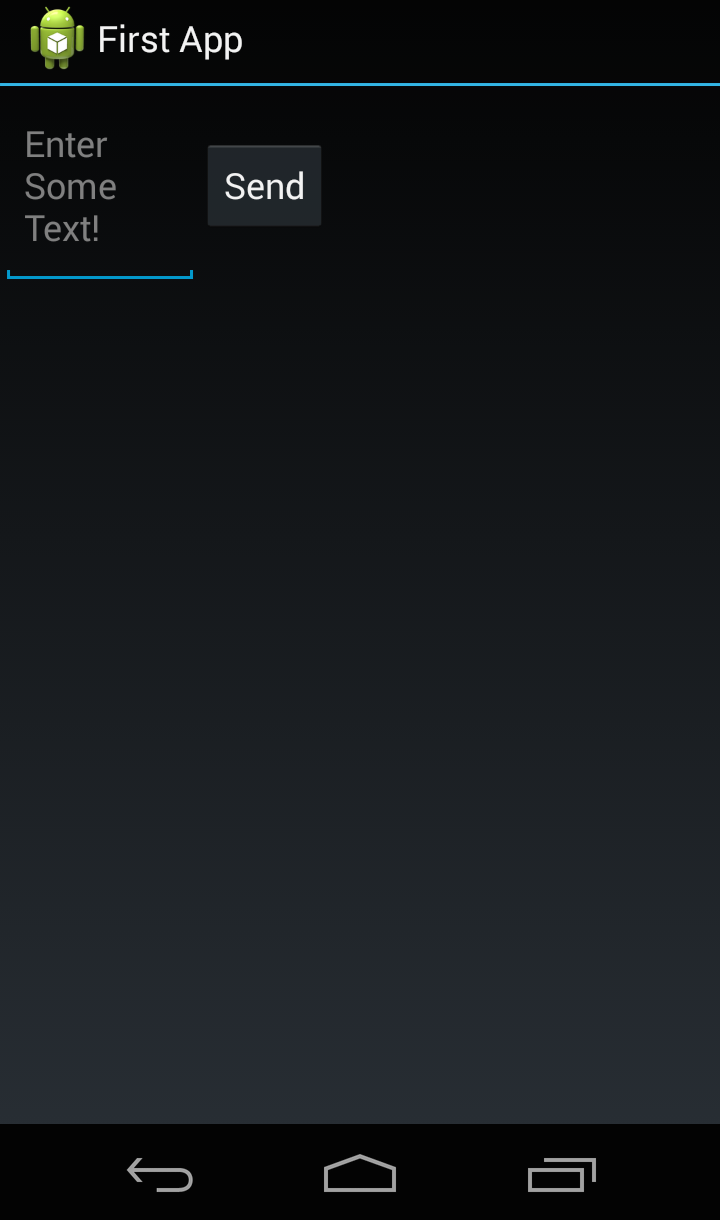
Our EditText looks kinda stumpy. Let's say we want to make it wider, like the full width of the container.
We could just use the setWidth method, but that method wants an exact pixel value. What if we wanted to set the width to match the parent container?
To do this programmatically we essentially have two routes: set size before the widget has been added to the activity (its container) or set the size afterwords.
Before
The before route is surprisingly verbose. Because we want to interact with the LinearLayout our EditText belongs to,
(so that we can match its width, or set a margin / padding relative to it) we need to talk to the widget's setLayoutParams method.
This method accepts a LayoutParams object as input, so we'll need to create one of those using the same class as the parent view (LinearLayout). Looking at the constructors, we can init our LayoutParams with an explicit width and height just like the setWidth method:
layout_params = Java::android.widget.LinearLayout::LayoutParams.new(200, 200)
and then set the EditText's layout params
edit_text.layoutParams = layout_params
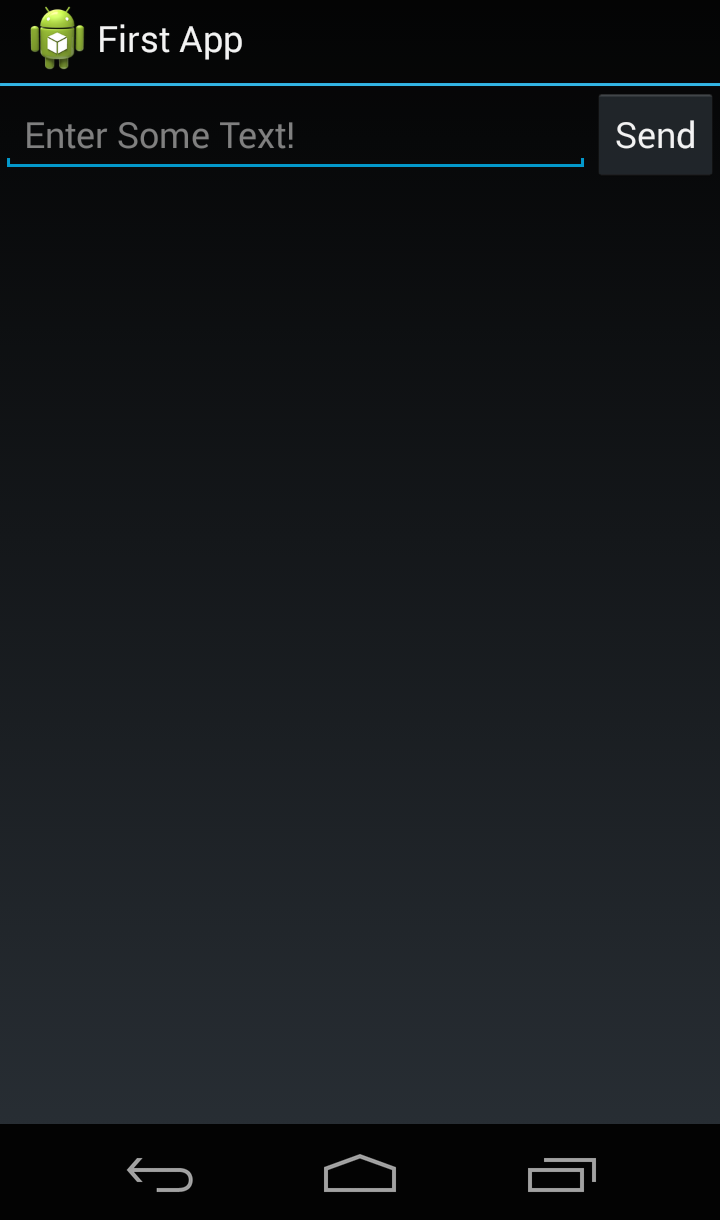
Of course, instead of arbitrarily choosing 200 pixels as the width and height of the EditText, we'd rather use some constants that the LayoutParams class provides us. I'll set the width to match the parent and the height to wrap the content. Altogether that's
class FirstAppActivity
  def onCreate(savedInstanceState)
    super
    layout = Java::android.widget.LinearLayout.new(self)

    edit_text = Java::android.widget.EditText.new(self)
    edit_text.setHint("Enter Some Text!")
    layout_params = Java::android.widget.LinearLayout::LayoutParams.new(Java::android.widget.LinearLayout::LayoutParams::MATCH_PARENT, Java::android.widget.LinearLayout::LayoutParams::WRAP_CONTENT)
    edit_text.layoutParams = layout_params
    layout.addView(edit_text)

    button = Java::android.widget.Button.new(self)
    button.setText("Send")
    layout.addView(button)

    setContentView(layout)
  end
end

This works, but it's kinda painful. Also notice that the button is gone (can you see why? We'll get to that in a moment).
After
If we've already added the edit_text to the linear_layout via addView then we can get the LayoutParams
of the View's Layout via the getLayoutParams method:
edit_text = Java::android.widget.EditText.new(self)
edit_text.setHint("Enter Some Text!")
layout.addView(edit_text)
layout_params = edit_text.getLayoutParams
layout_params.width = Java::android.widget.LinearLayout::LayoutParams::MATCH_PARENT
If you run that you'll get the same app as before.
Sidenote - At first, I hadn't expected
width= to be available on a LayoutParams object since it's not listed as a method (inherited or otherwise) in the docs. After a bit of exploring, it looks like the clue to that method's availability is in the Inherited Fields section of the reference. Good to know!
Recovering the Button
OK, the last thing we need to do is get that button back. A simple way to accomplish this is to use the weight attribute.
There's a great little explanation from the developer training that this tutorial is based on:
The weight value is a number that specifies the amount of remaining space each view should consume, relative to the amount consumed by sibling views. This works kind of like the amount of ingredients in a drink recipe: "2 parts soda, 1 part syrup" means two-thirds of the drink is soda. For example, if you give one view a weight of 2 and another one a weight of 1, the sum is 3, so the first view fills 2/3 of the remaining space and the second view fills the rest. If you add a third view and give it a weight of 1, then the first view (with weight of 2) now gets 1/2 the remaining space, while the remaining two each get 1/4.
So if we want the EditText to fill the width of the screen, but still leave room for the button
we'll give it a weight of 1 like so:
class FirstAppActivity
  def onCreate(savedInstanceState)
    super
    layout = Java::android.widget.LinearLayout.new(self)

    edit_text = Java::android.widget.EditText.new(self)
    edit_text.setHint("Enter Some Text!")
    layout.addView(edit_text)
    layout_params = edit_text.getLayoutParams
    layout_params.weight = 1


    button = Java::android.widget.Button.new(self)
    button.setText("Send")
    layout.addView(button)

    setContentView(layout)
  end
end
There you have it folks. A simple user interface in just 10 lines.